Although most of you who have suggested to me that I start a blog want to read my amusing stories, I'm starting with something a bit more visual. I'm going to post some pictures of some of my sewing projects. I guess you can sort of see this as "Bernie's Pattern Review," too. So, I'll post a few of my items here, mostly from newest to oldest.
First up is my version of Amy Butler's Blossom Bag. This is a free pattern available online. (See link at the end of this post).


I deviated slightly from the pattern. Firstly, and most significantly, you'll see that it's much smaller than the original. I printed the pattern pieces out, then photocopied them to 65% of the original size. In retrospect, I actually think this is a bit small. I also photocopied the pieces at 73% of the original size, which is what I'll be trying next time.
Next, you'll see that the whole thing is all made with one colour. The one thing that I have not liked about MOST other versions of this purse that I have seen online so far, is that they're done in "loud" patterns, usually different on the outside and inside. That's just not my style, so I made it all one colour, a very subdued dusty pink, with a silvery sheen. It's also not the recommended decorator weight fabric. I found this 0.6m piece in the remnants bin at Fabricland for $3.60, with a buy-one-get-one-free.
Another variation was that I put "purse feet" onto it.
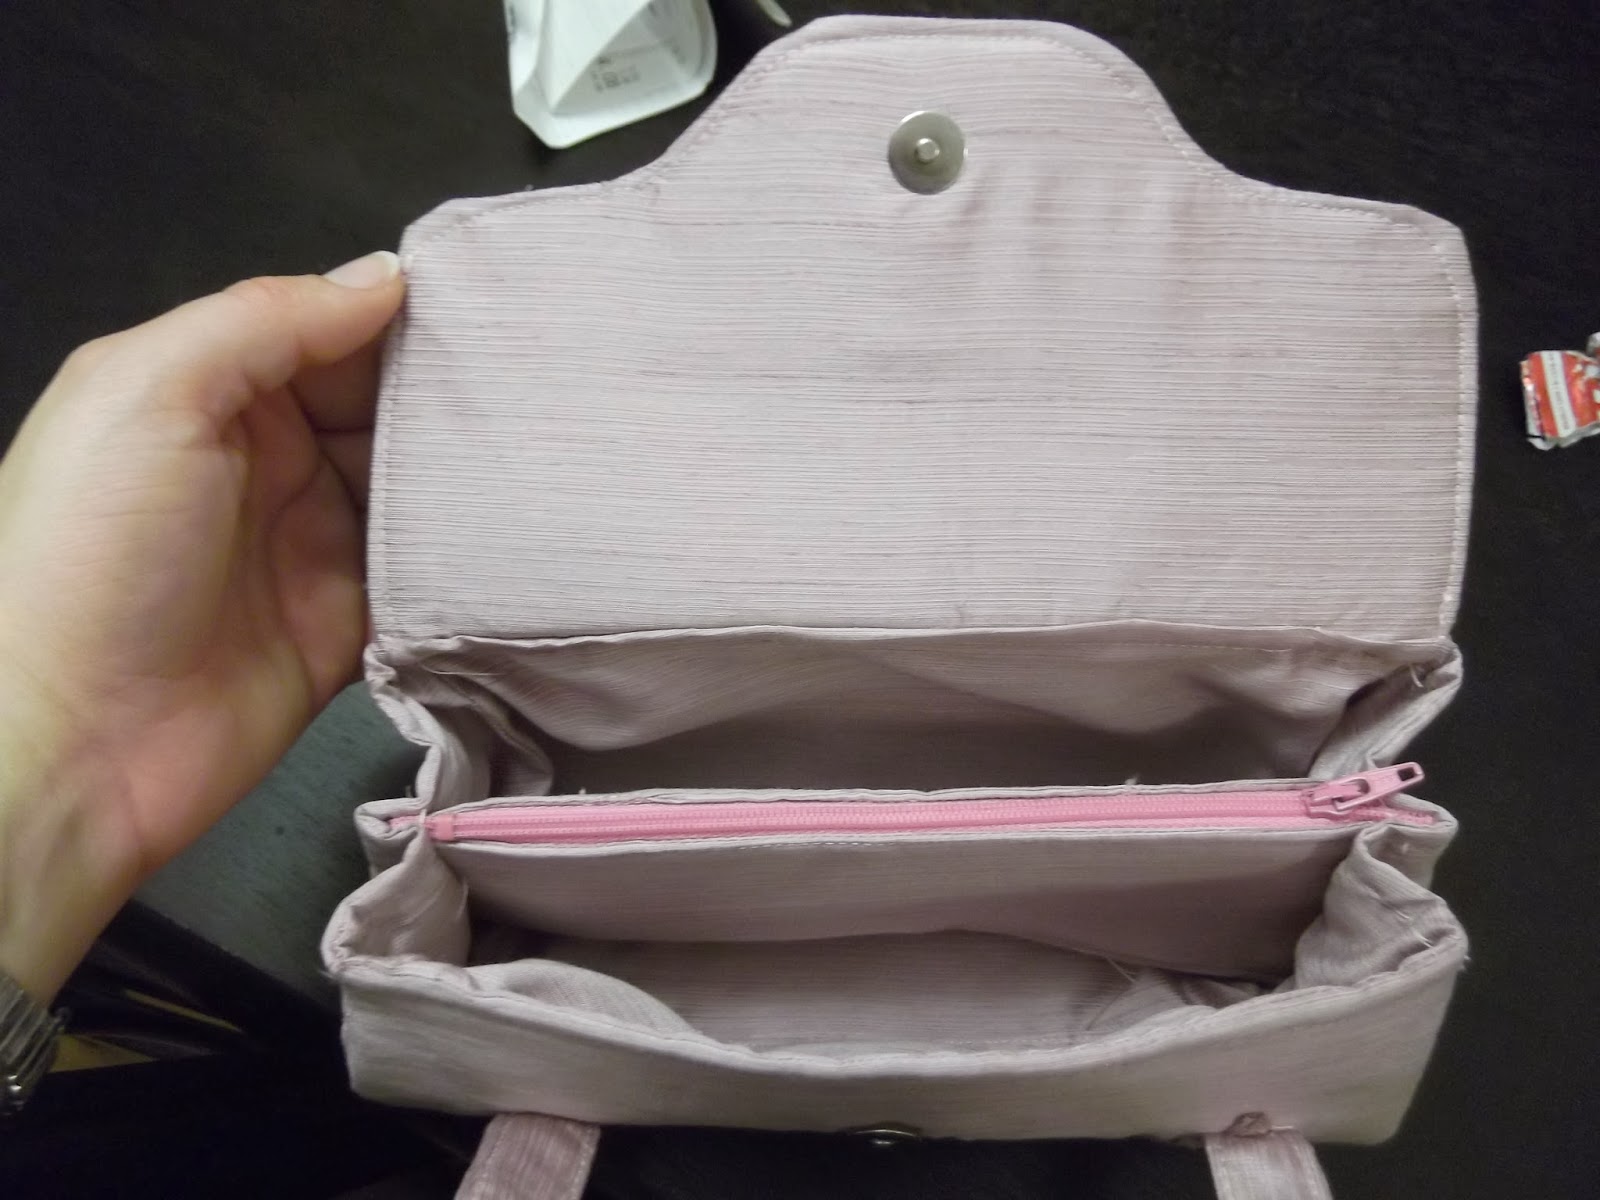
The next variation was that I only put one divider section in. I made two, but as I'd reduced the pattern, there just wasn't enough of the side panel to grip two of those, and still keep its shape, so I ended up with only one. Ah, well.
I also deviated a little bit on the handles. In the original pattern, you're supposed to sew a little strip over the top of the "triangles" where the handles attach. I decided against that, eliminating the need for them by cutting the Peltex shorter than the handles so that I could neatly fold the ends over, so that there was no need for the little strips over the edges. I'm pleased with this variation, and will repeat it in future versions.
This was my second use of Peltex, and I think it has changed my sewing forever!! I was first intimidated by it, but no more! I am pleased to say that my sewing machine did not experience any difficulty with it at all. (I'm currently loving my Elna sewing machine all the more!) I read on other blogs that some people had difficulty attaching the pocket inserts, as that required sewing through four layers of Peltex. I eliminated that need.... or, rather, I planned to, anyway.... I cut little triangles into the top of the Peltex on the side panels where I planned on inserting the pockets. In the end, I only used one, so my placement was a bit off, but then I also think I made the seam a bit wider than was intended, so I think that bit of planning paid off.
The final deviation I made from the pattern was attaching the flap. That was one of the features of the pattern (even in the original pictures) that I did not like: the flap overlapped on the back, and just didn't "flow" with the bag. I did it differently, and attached it to the bag exterior prior to attaching the lining. I'm VERY pleased with this change, and highly recommend it. I learned this technique from a clutch pattern, which was the very first purse I had ever made, and now use it always. (I'll post links to that, when I find it).
The one "oops" on this purse is that I forgot to install the magnetic snap before the lining, so the inside of that shows on the inside of the purse. I'm not too disappointed about that, though, as it tends to hold the lining down extra. Still, if I were to make this for someone else, I'd do that part differently. I couldn't really follow the instructions on where to put the snap, as I'd reduced the pattern, so the measurements didn't mean anything. I got the positioning right, but I really should have done it before inserting the lining.
All in all, this is NOT such a scary bag to make! I've read some horror stories about it, but it's not that bad! As everyone says, the difficulty with this pattern is the number of pieces required. By looking at it, you can't tell, but here's what it amounts to.... as each of the exterior pieces have a piece of Peltex sandwiched in between fusible interfacing, and each of the interior pieces are interfaced, this amounts to a grand total of..... 39 pieces!! The frustrating thing about the pattern is that it does not include the pattern pieces for the Peltex. At first glance, this does not seem to present a problem, because it's essentially identical to the exterior pieces, except the seam allowance smaller around the perimeter. That means that you cut the piece out, then draw a new cutting line, and trim each piece of Peltex smaller. (I didn't do it that way: I photocopied two sets of each pattern piece, and then trimmed one set for the Peltex pieces. I recommend this step! Else it's also a waste of Peltex.
Something I do want to attach to this purse is a long shoulder strap. I carry my purses cross-body, so the longer shoulder straps don't really cut it for me. I'd planned on attaching the strap to the side panels between the two pockets, but now that there's only one pocket, and it's centred (obviously), there's no sensible place to attach the strap. I'm going to have to be creative about this, I think.... I haven't made the strap yet. Maybe this purse will just have to be "strapless," in which case it will end up just being a "Church purse," as I can't very well go shopping with it, because I'd have to carry it all the time!
So, there you have it.... Blossom Purse #1.
The pattern, for anyone interested, is located here: http://www.sewmamasew.com/september2010/StyleStitches.pdf
No comments:
Post a Comment